
The “W” is one of the most popular and scenic multi-day hiking trails in Patagonia. It was a must do for me on my trip to Chile and the rest of my trip revolved around it. While I met friends later, I hiked it on my own and had a fantastic experience.
There are many ways to hike the “W”:
You can do it realitively inexpensively if you bring your own gear and food. I did not do this. While I frequently do multi-day hikes, the “W” was only 5 days out of a 30-day trip. I did not want to be carrying around my stuff for the rest of my trip. I also had no intention of trying to buy food and fuel in a Chilean grocery store and then breaking it down in a hotel room. I’ll do that at home, but not in this situation.
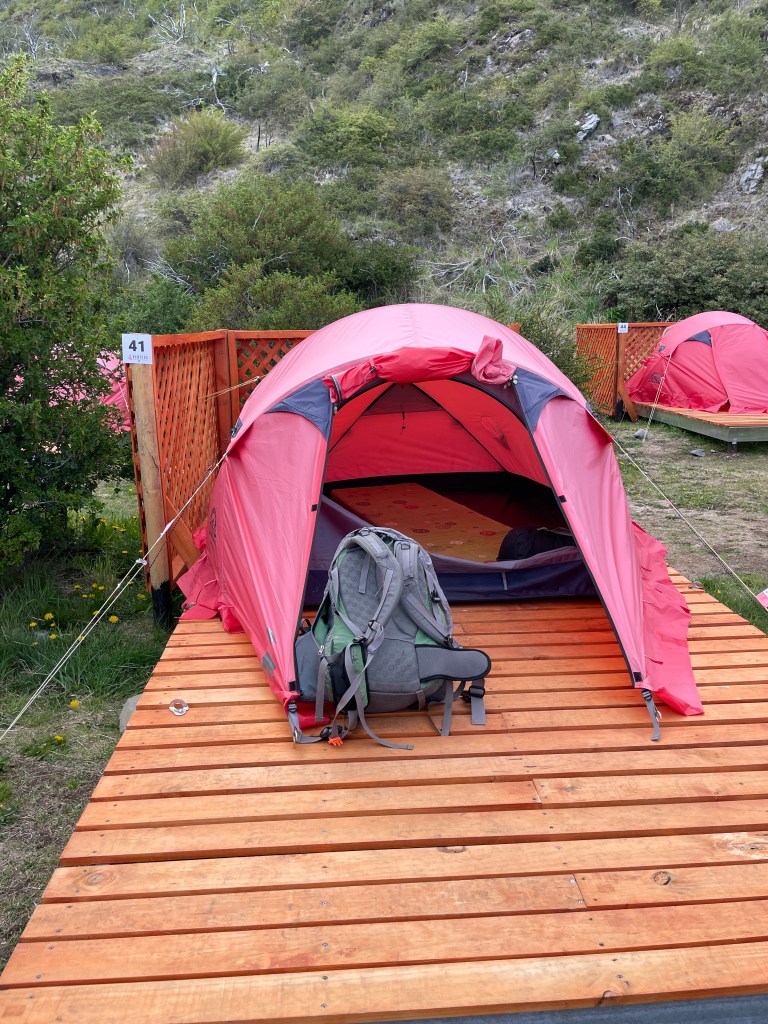
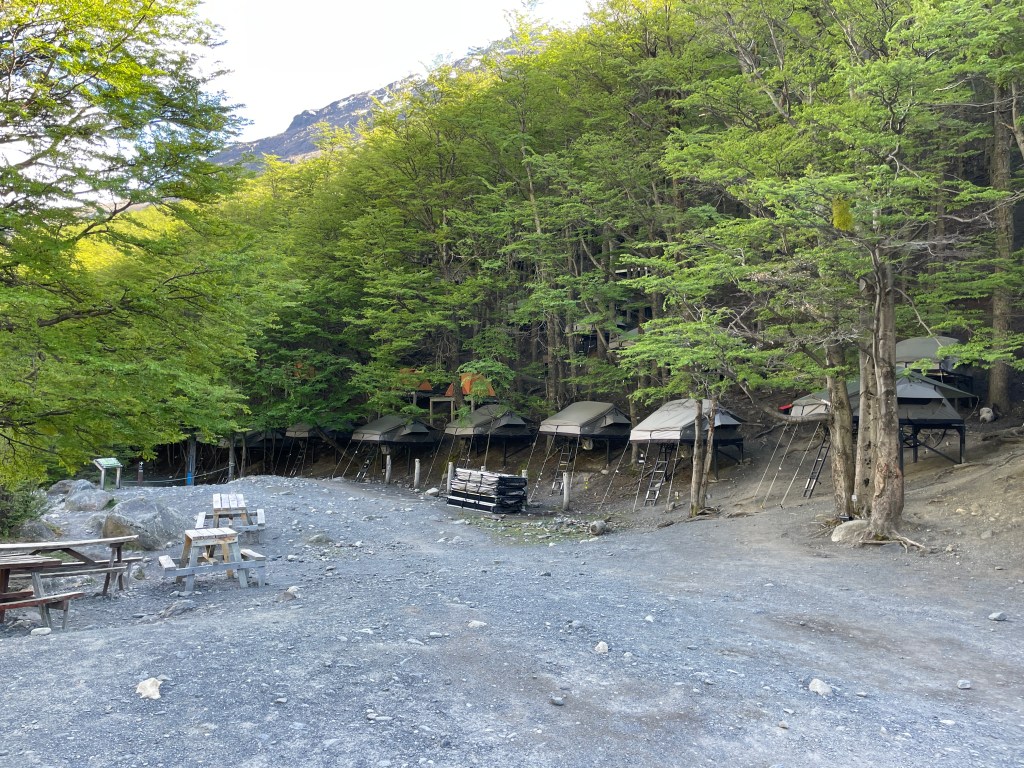
Next up, you can rent equipment and either pack it yourself or have it set up for you at the sites. In my opinion, this was more expensive than “camping” should be. I also hate to be cold, which is unfortunate, because I am always cold. I ended up camping the last night and was both cold and uncomfortable. But if hiking for an extended period of time, this will definitely keep the cost down. It was also clear that not all “camp grounds” were equal. I met some people who camped every night (with rented prepositioned gear) and they definitely preferred Central more than Paine Grande.
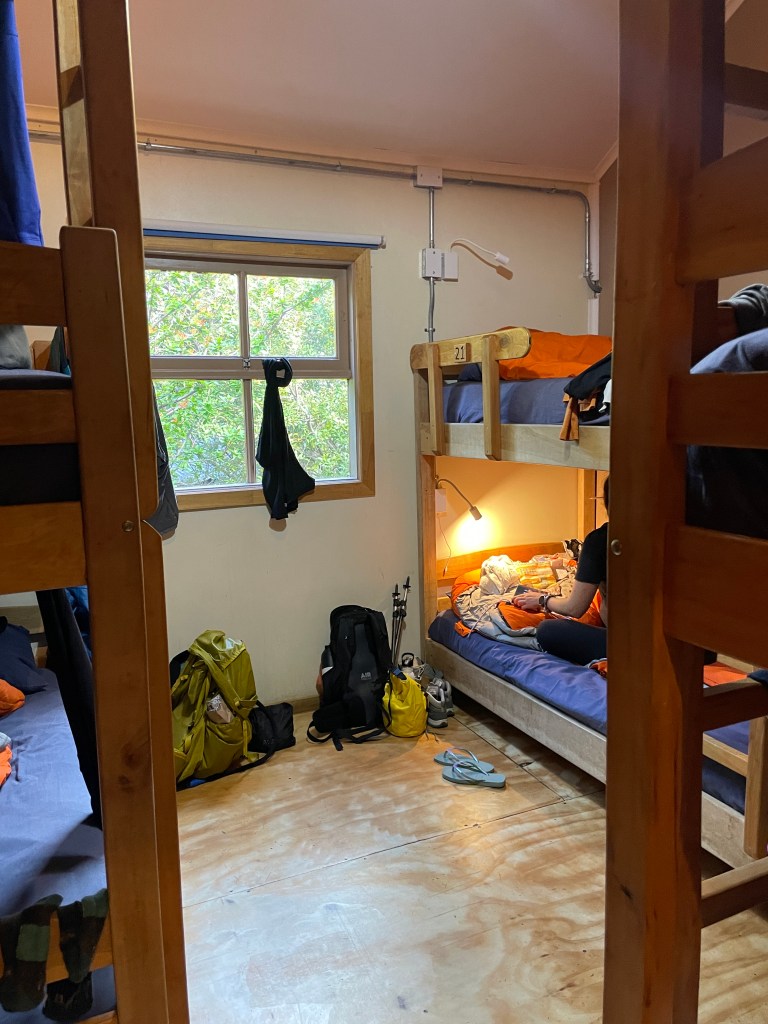
There is also an option for refugios (bunk houses) and a meal plan. This is what I chose, and I am glad I did. Not only was it a more comfortable option, but I was able to meet people in the communal spaces. This was one of my favorite parts of the trip.
Finally, at the cost of $990 US a night, you can stay in a resort hotel in the park and do day hikes. Even if I had the money, I really wanted to do the through hike, and so this was not an option for me. But the lodge was beautiful with a spectacular view.
For any of the above plans you can choose to bring and cook your own food or to pay for full board. Full board is about $110 a day. I am a fairly picky eater. I thought the dinners were pretty good, the breakfasts were ok, and the lunches were pretty basic. It felt about 3x the cost of what it should be – but the combination of a monopoly, extra transportation cost, and the freedom to not have to carry and worry about food means I would do it again.
Regardless of what experience you choose, hiking the “W” or the “O” takes some advance planning. I didn’t start until about four months out and definitely felt like I was behind the power curve. There are limited rooms, beds and campsites. There are websites where you can make reservations yourself. Or you can pay extra for a company to make the reservations for you. Because I was booking during peak season and so close to my dates (again 4 months was close), sites were booking up fast so I used a company. I am glad I did, but if I’d had more time or going again, I would save some money and book myself at Torres Hike.
When booking, make sure to indicate if you have a preference for a top/bottom bunk and if you have any food allergies / restrictions.
Finally, you don’t need a guide for the W or the O. Trust me. I can get lost or turned around anywhere. It was fine. While I did have a few missteps, none of them required paying for a guide. The signage is great, you can follow the crowd, and if worried, just download the All Trails App as a safety measure. In fact, the guided tours I saw looked pretty miserable – especially the fastest and slowest person of each group!
Gateway To and From the “W” (and the “O”):
Either Santiago Chile or Buenos Aires Argentina will be your hub. From there, most people fly to either Puerto Natales or Puerto Arenas. Puerto Arenas is the capitol city of Patagonia. However, Puerto Natales is closer to the Torres del Paine park and quainter. I choose Puerto Natales as my gateway and I’m glad I did.
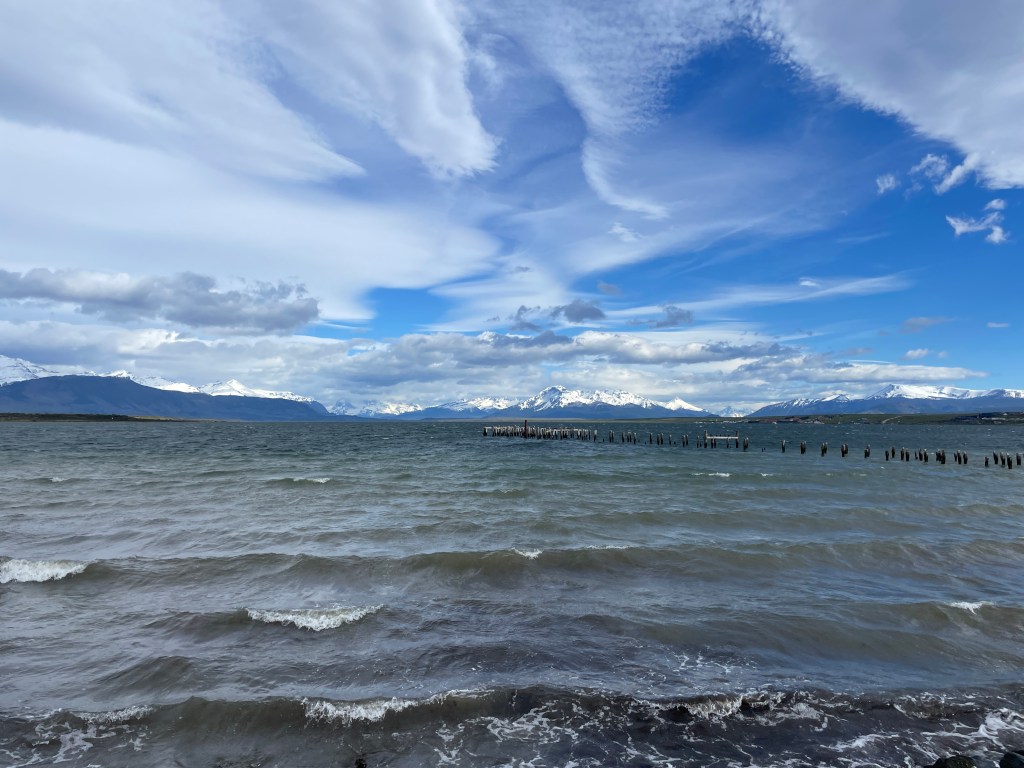
Flights to Puerto Natales are less frequent, but I really enjoyed my time here. And based on what I heard from others; I think I made the better choice. I opted to spend a night here on either end of my trip. Strictly speaking, I don’t think you need to, but my international flight was the day prior and I was meeting my mom the day afterwards, so it made sense for me.
From Puerto Natales, you’ll take a two-hour bus ride to Torres del Paine park. There are dozens of bus companies and buses leave practically every hour from 7 am onward. I used Buses Gomez there and Bus Sur on the way back. One way is about $12 USD. The bus station is an easy 15-20 minute walk from the center of town. There are also taxis available. Be at the bus station at least 15 minutes before your departure time. The signage isn’t great and there are no announcements — so pay attention.
Puerto Natales:
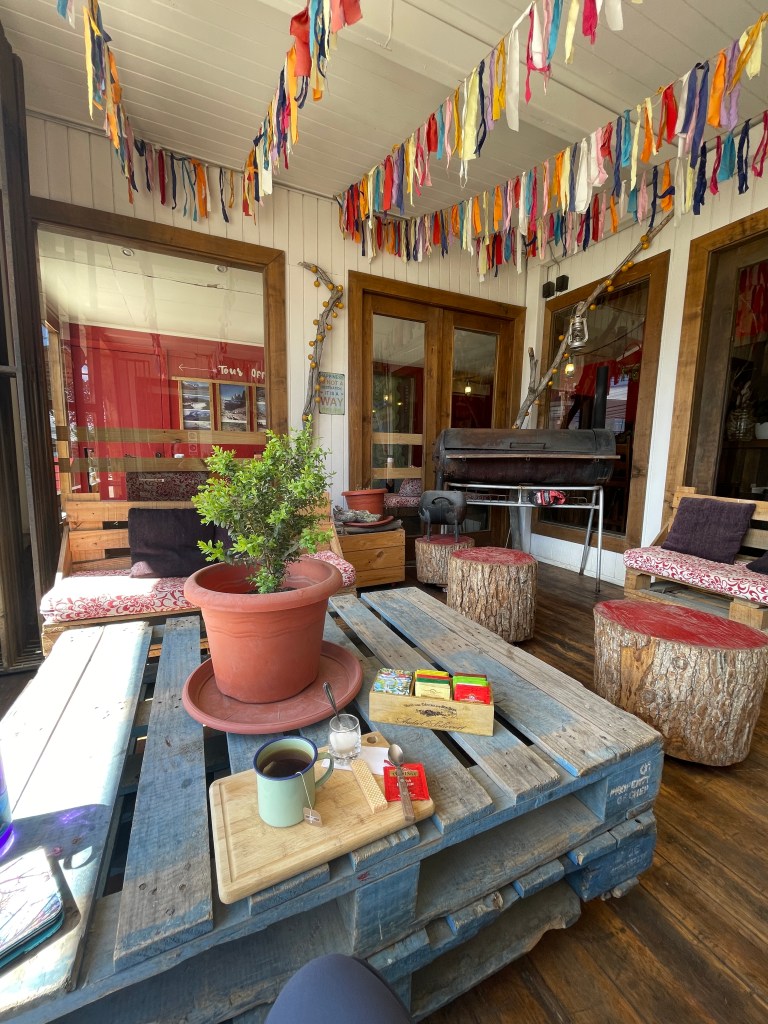
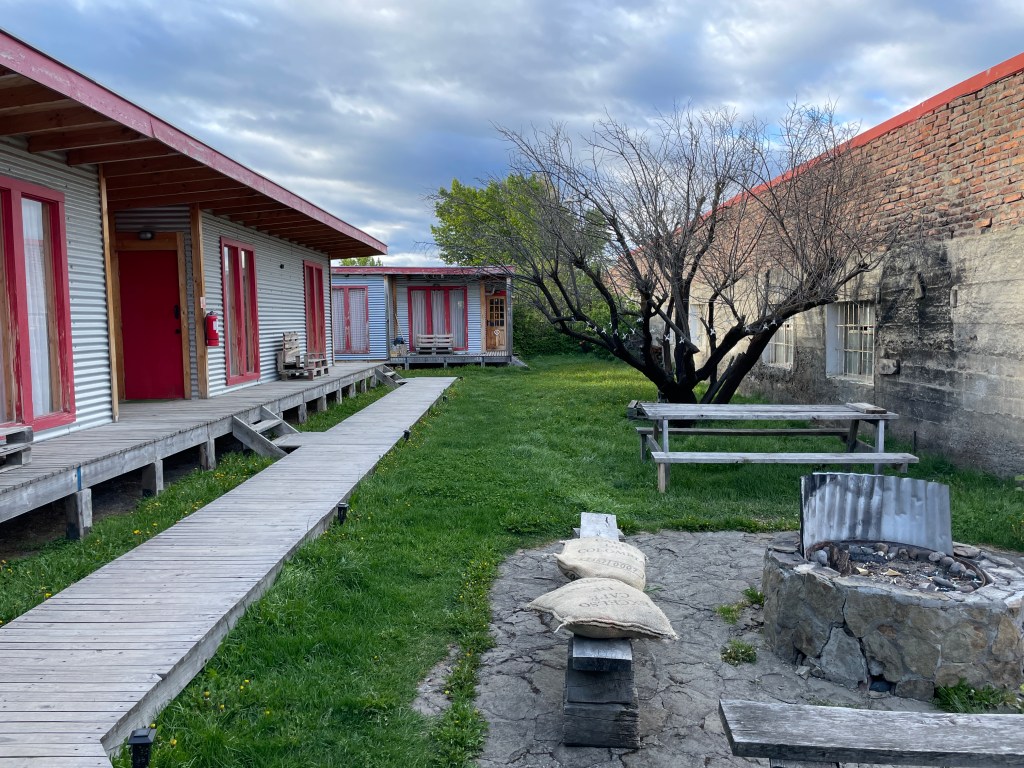
While maybe not a destination in its own right, I really enjoyed my time in Puerto Natales. The scenery was beautiful, the people were friendly, and there were lots of great places to eat.
If you need to rent or buy any gear, it is easy in Puerto Natales. I rented poles from Rental Natales Camping and Outdoors Gear Rental in Puerto Natales – Rental Natales. Pay attention to what they consider “a day.” I think I stupidly paid for longer than I had to.
There is a lovely walking path along the water. Head towards the airport with the water on your left.
There is also a small museum that covers the history of the area. I found it very interesting as it focuses on Patagonia (both Chile and Argentina). I was there about 30 minutes.
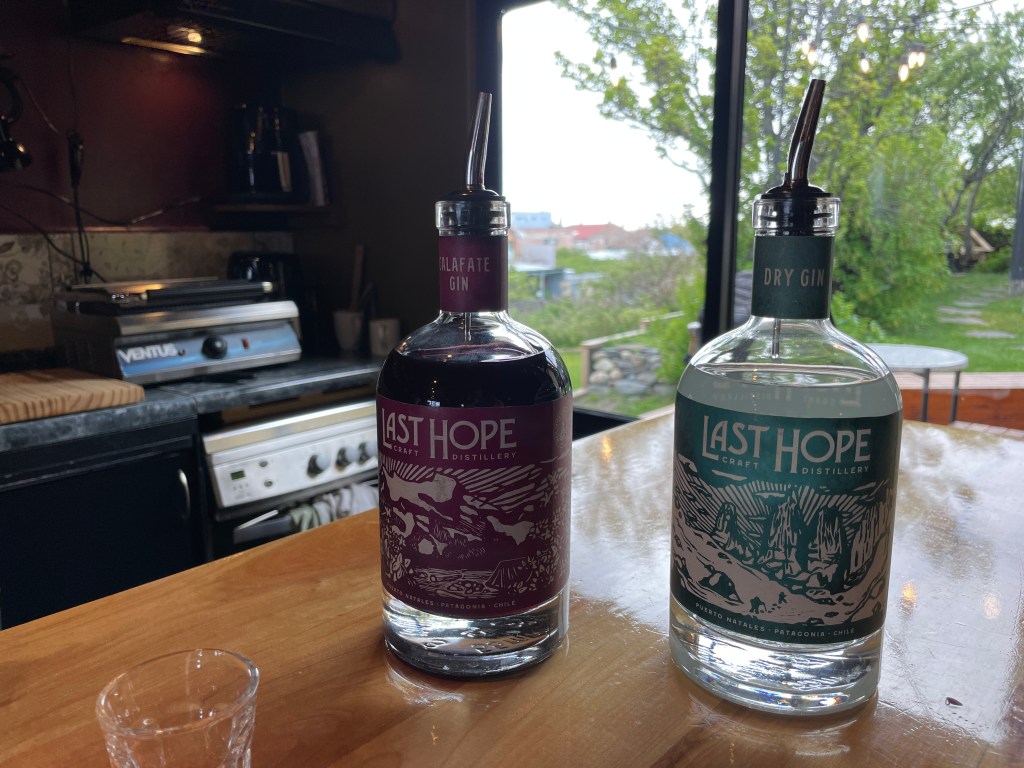
The Lost Hope Distillery is the Southernmost distillery in the world. They only have Gin and Whiskey (depending on the time of year). I had a Calafate G&T which is one of their specialties. You want to get there early in order to get a seat. By the time I left, there was a line.
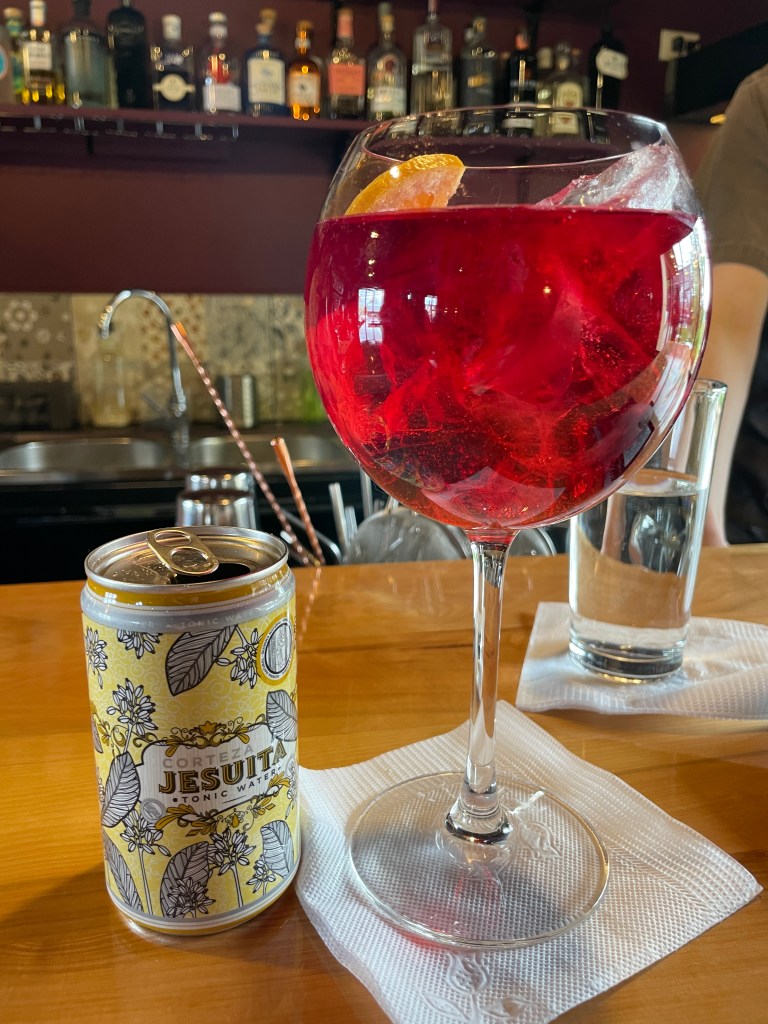
There were some great food options for such a small town. Napoli for dinner was pretty good but Mesita Grande was one of my favorite meals of 2023. El Delicious O had a great hummus sandwich.
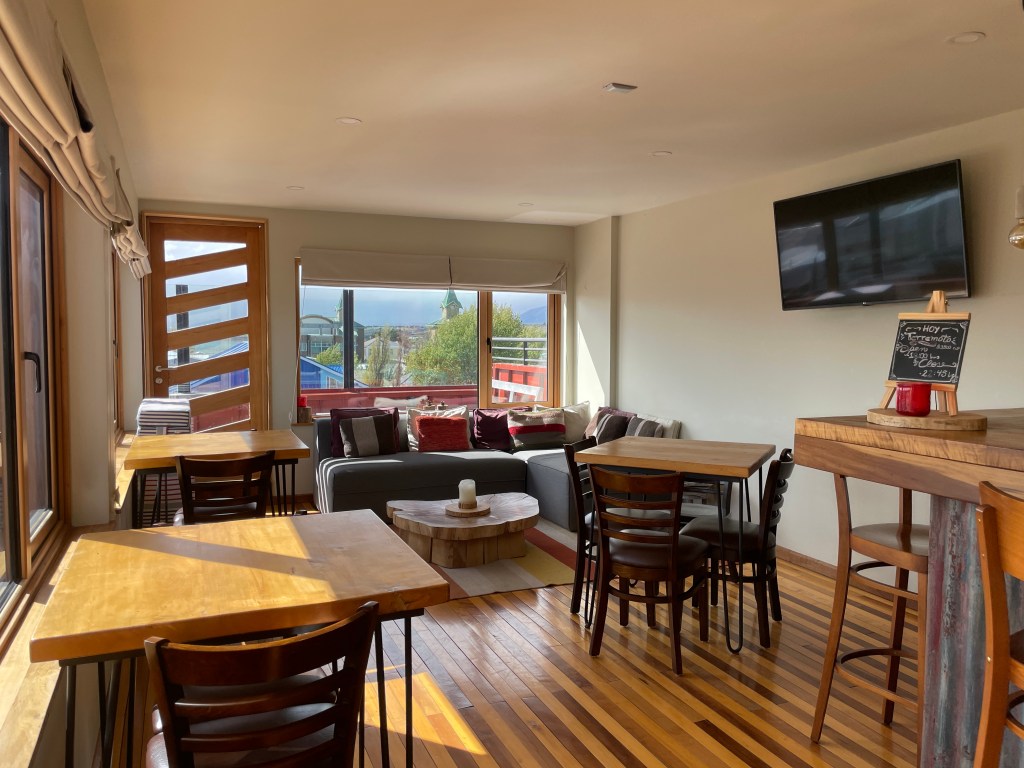
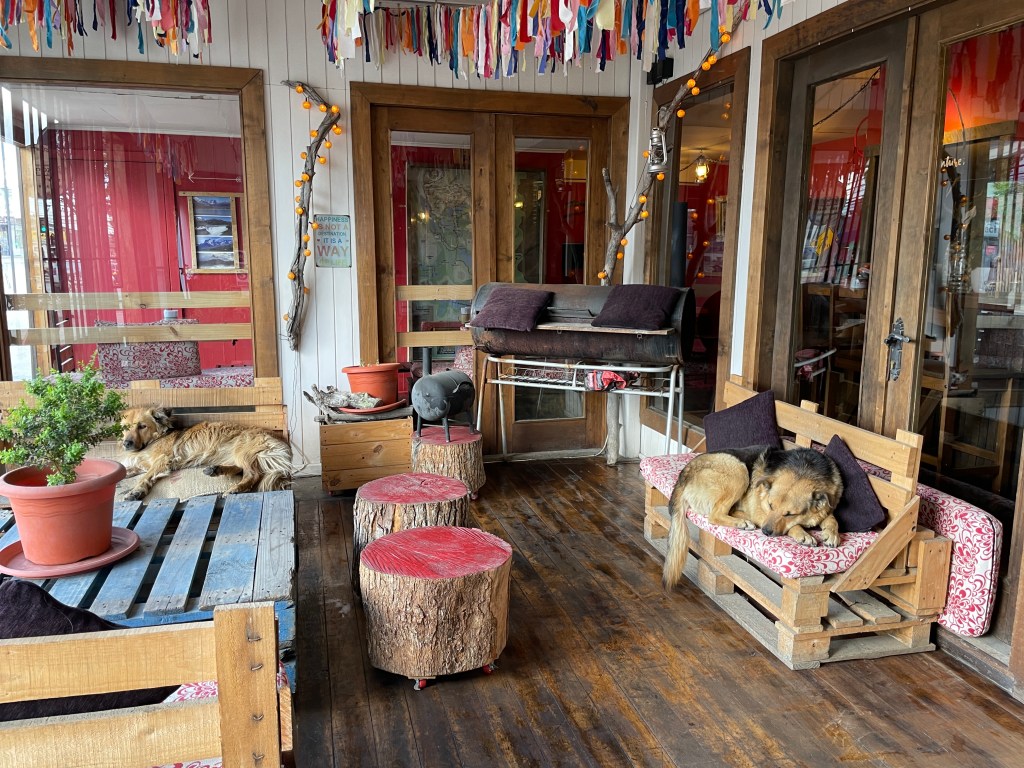
I stayed at both Hotel Vendaval and Wild Hostel. Both were great. Hotel Vendaval was slightly cheaper and nicer. It had an open feel with large windows and a rooftop bar with 360 views of the town and landscape. But Wild Hostel had better food, comfortable common areas, and an engaging staff.
On my last morning before my return flight, I had a massage at Mandala Andino which was a wonderful way to cap off the hike.
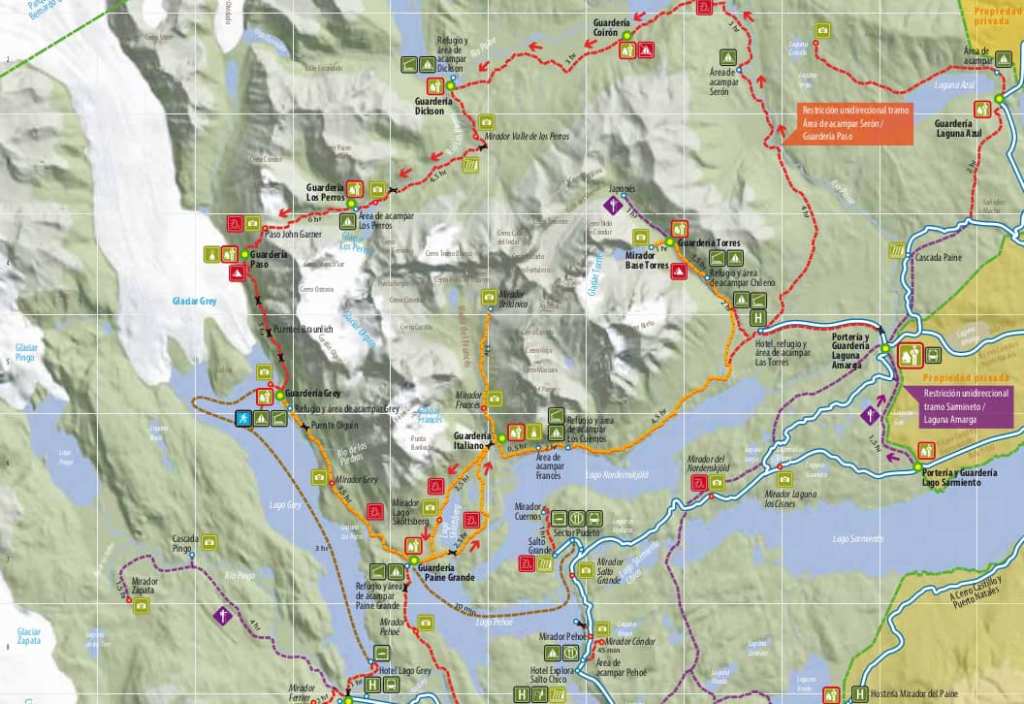
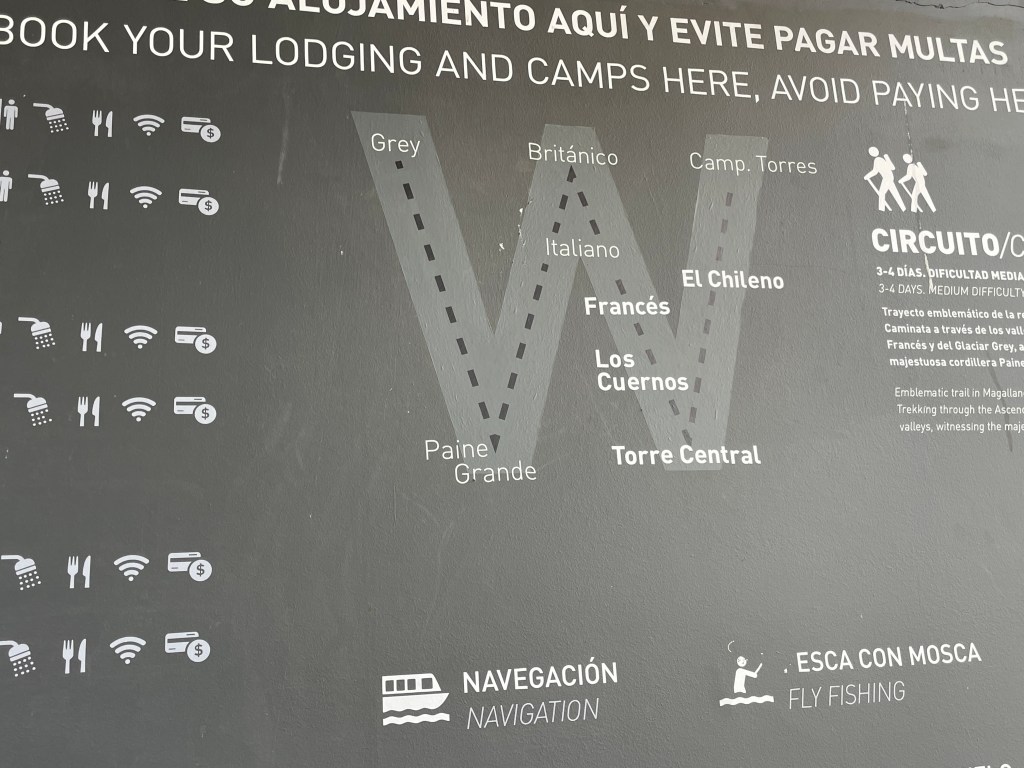
The W Overview:
There are lots of ways to hike the W.
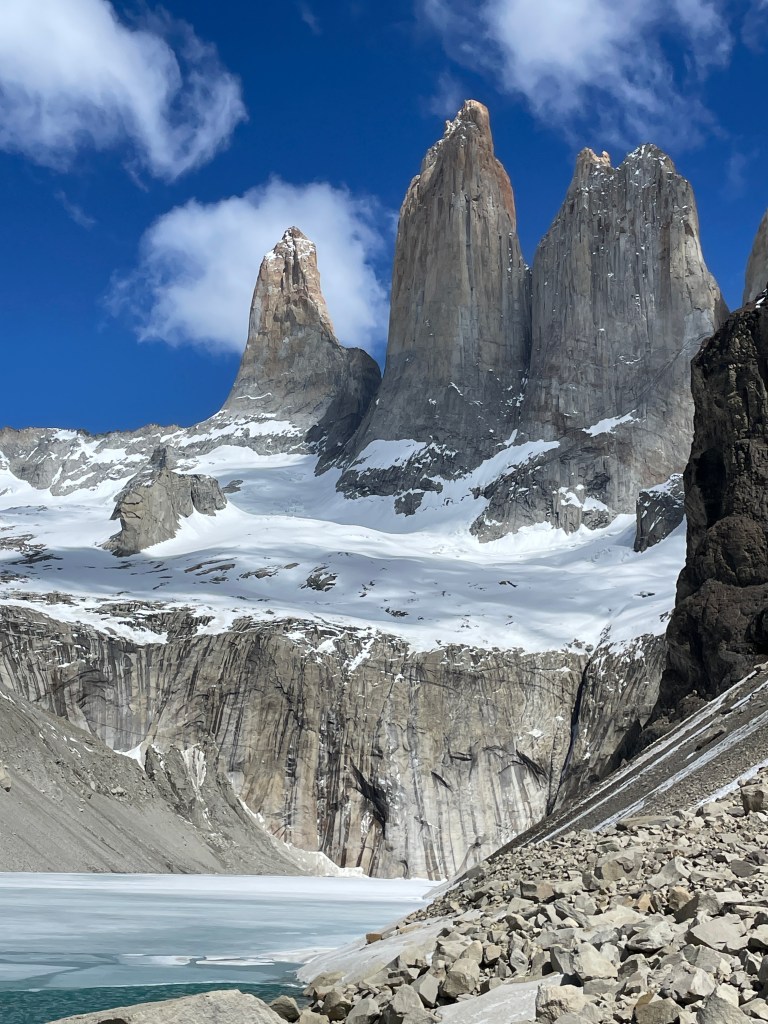
If you hike the entire W, you will need to decide if you hike East-to-West or West-to-East. For a few reasons, I definitely recommend East-to-West. 1) Las Torres is the most iconic vista of the trek. It is also the hardest day. Do this while you are fresh and excited. This is especially true if you are worried about your fitness level. It would have been a much harder day for me on day 4 than it was on day 1. 2) Central has a much more open and communal feel to it. Everyone I met, except for one person, I met there and then got to enjoy talking and hiking together for the next few days. 3) If you get tired or are short on time, it is easier to trim down the mileage on the 3rd and 4th day. 4) I loved beginning my trip by seeing Las Torres in the distance and ending with the ferry ride.
You can hike Las Torres and Grey Glacier as day trips from Puerto Natales. These would be long days (4 hour round trip bus) but this would cut down the cost considerably.
You could also use Central and/or Paine Grande as a home base and stay for two nights each. This would eliminate the need for carrying your pack while hiking. It would require a little bit of extra logistics to get from one to the other.

My W:
Day 1: Puerto Natales to Torres del Paine Park
I walked to the bus stop at Puerto Natales and caught an early afternoon bus. The two-hour drive was filled with beautiful scenery, Emmus, Flamingos, Alpacas, cows, and sheep.
Your bus will stop at park entrance where you will show your ticket and transfer to a smaller park bus that runs every 15 minutes. Purchase your ticket in advance here at Torres del Paine Park – Torres del Paine National Park, Chile (parquetorresdelpaine.cl).
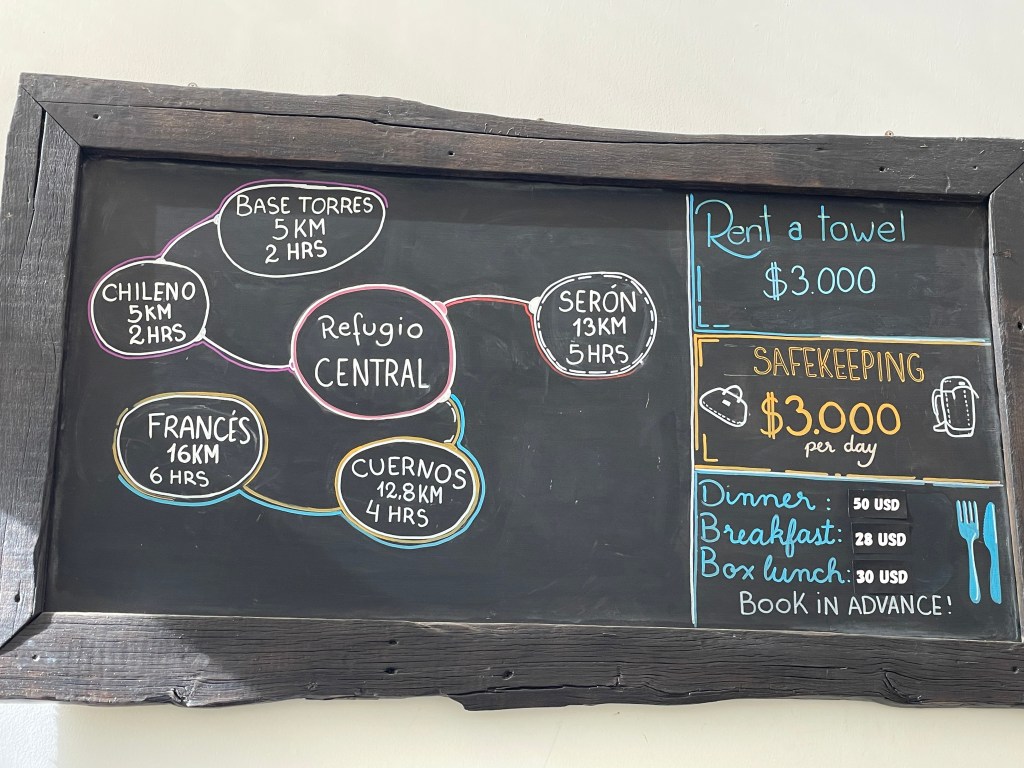
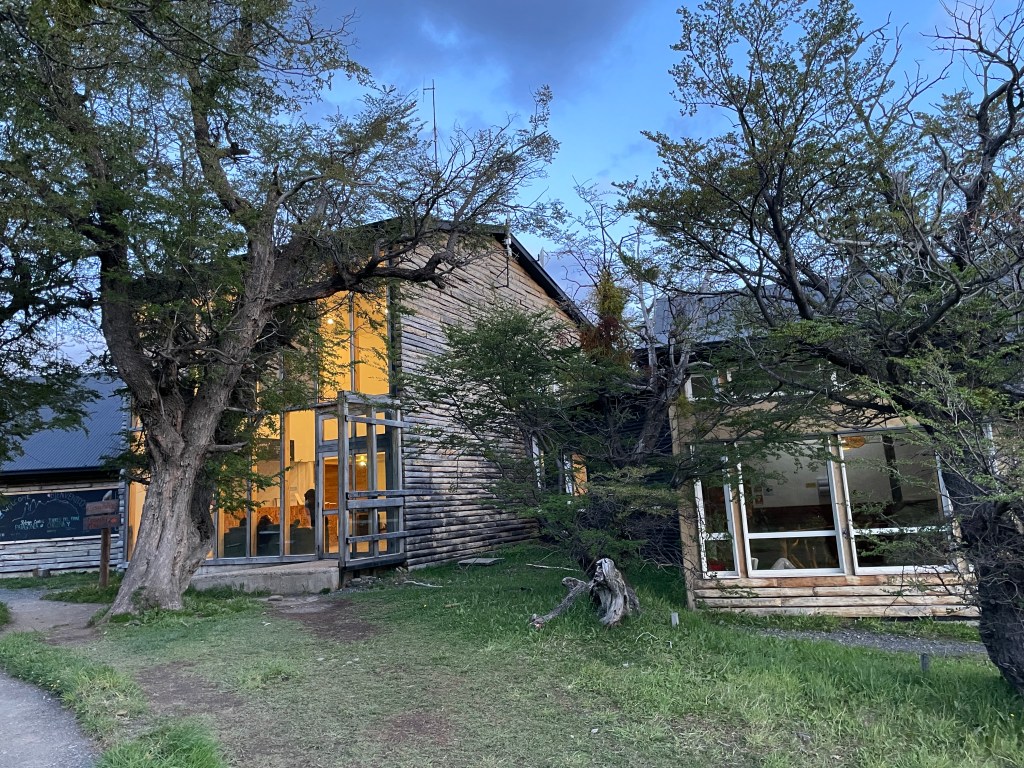
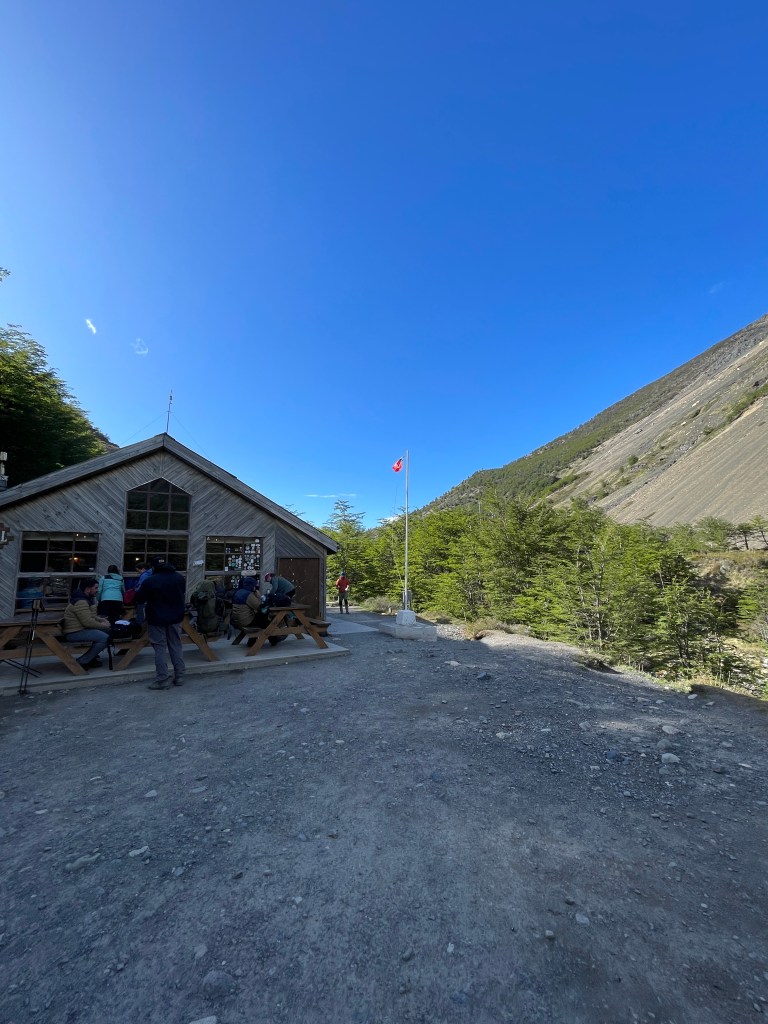
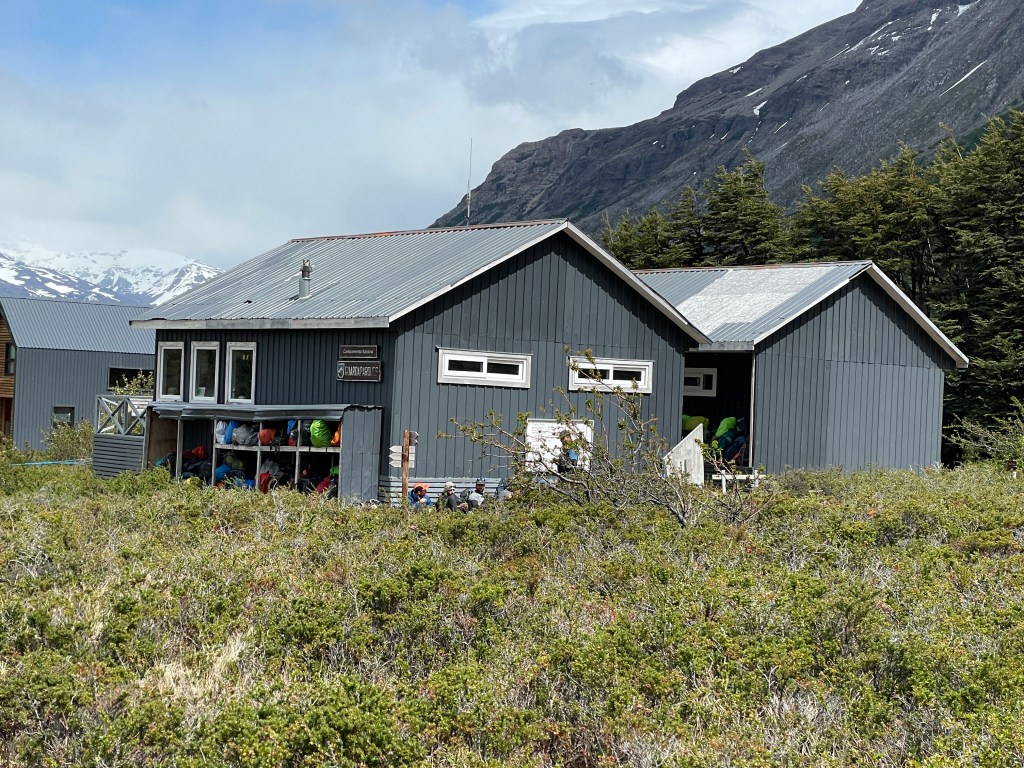
I stayed at Central Refugio two nights. It was by far my favorite accommodations. There were 6 beds (3 bunks) per room. There were lots of open common spaces. The water was plentiful and hot. And the meals were the best of the three places I stayed.
*If you are interested in seeing Las Torres at sunrise, then I recommend hiking from Central to Chileno the afternoon you arrive. It is about another 2 hours further to the towers. While I met people who did it, but I would not be comfortable hiking the last rocky bit in the dark.
*The first two days of the trek were also my favorite. I were taking someone who was not interested in doing a through hike, I would consider staying at Central Refugio for two nights with a day hike to Las Torres and then an out/back day hike along the Nordenskjold lake.
Day 2: Central to Las Torres back to Central
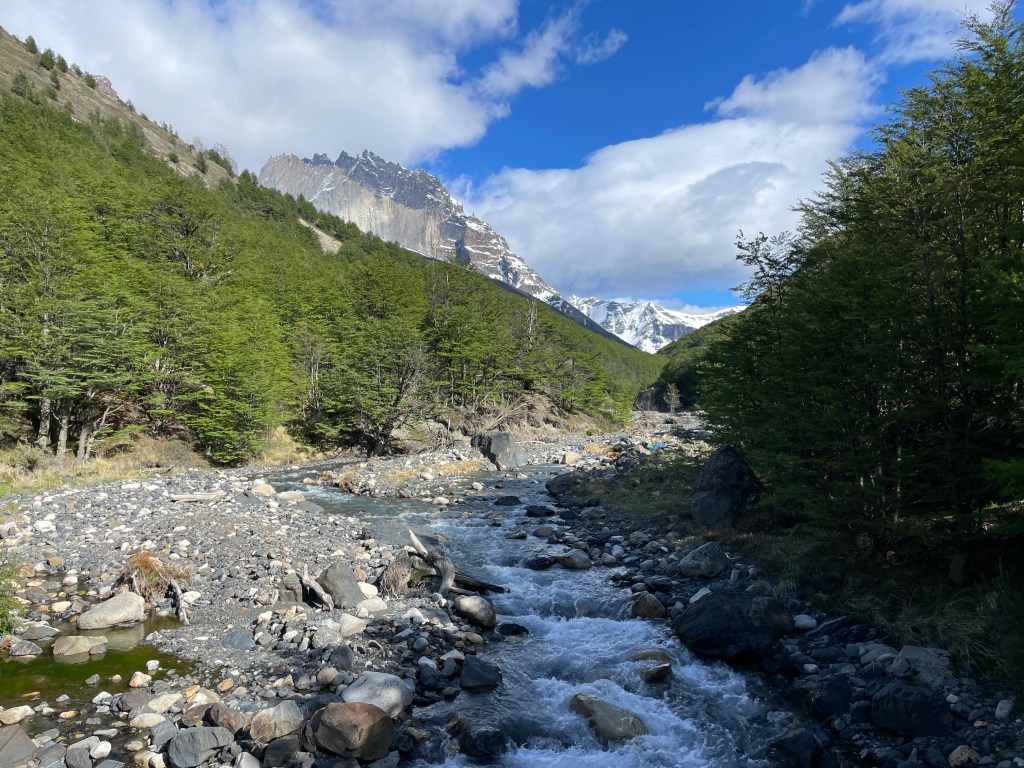
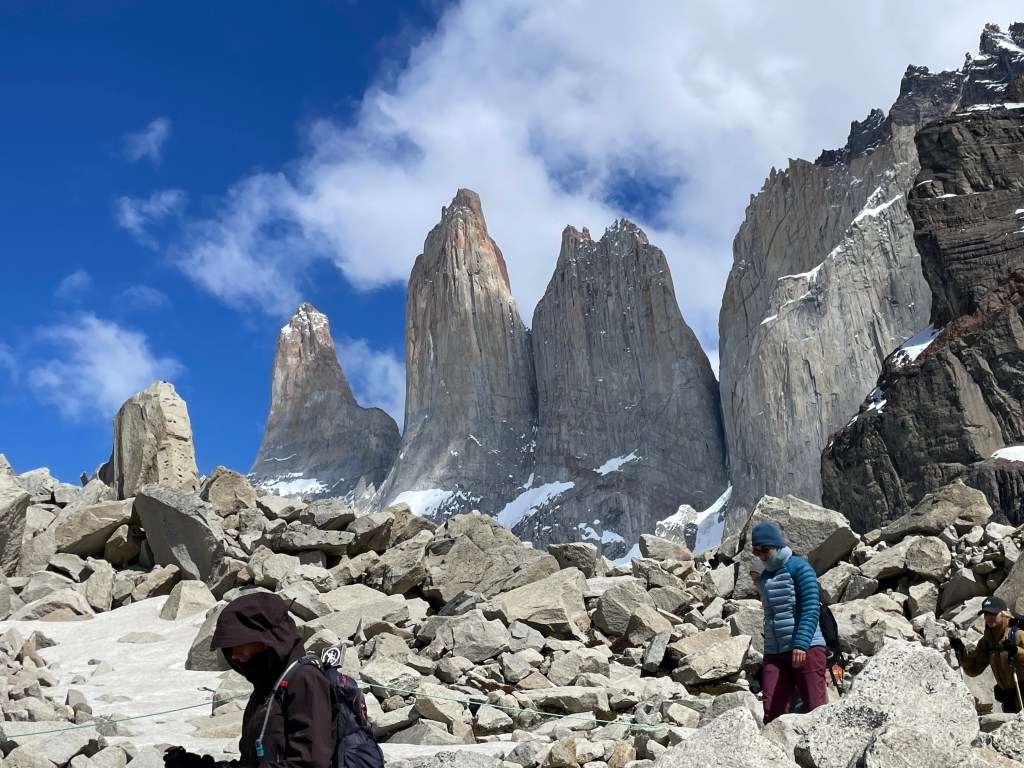
This was an out and back hike to Las Torres. This was by far my favorite day and one of my favorite hikes ever. That said, it was HARD. It is 10.6 km one way, took me 10 hours round trip (including stops). It is steep. The maps say it should take about 8 hours. It took me 4 hours and 45 minutes up and I spent 45 minutes at the top. I was a little faster going down. The first hour is pretty easy and the entire hike is absolutely beautiful. The last hour is very steep and very rocky. I was glad I had both boots and poles. I was there in early Nov, and while there was a little snow at the top, it didn’t require gaiters or water proof footwear.
*I am glad I went back to Central, but if you are in shape and looking to save time, you could also just hike on to Cuernos. If you do this, on your way up to Las Torres you can dump your pack at Chileno and avoid carrying it up the last 2 hours.
*Another option for saving time would be to hike to Chileno on day 1 after arriving at the park (this would have taken me about 2 ½ hours) and then on day 2 head to Cuernos or Frances.
Day 3: Central to Cuernos
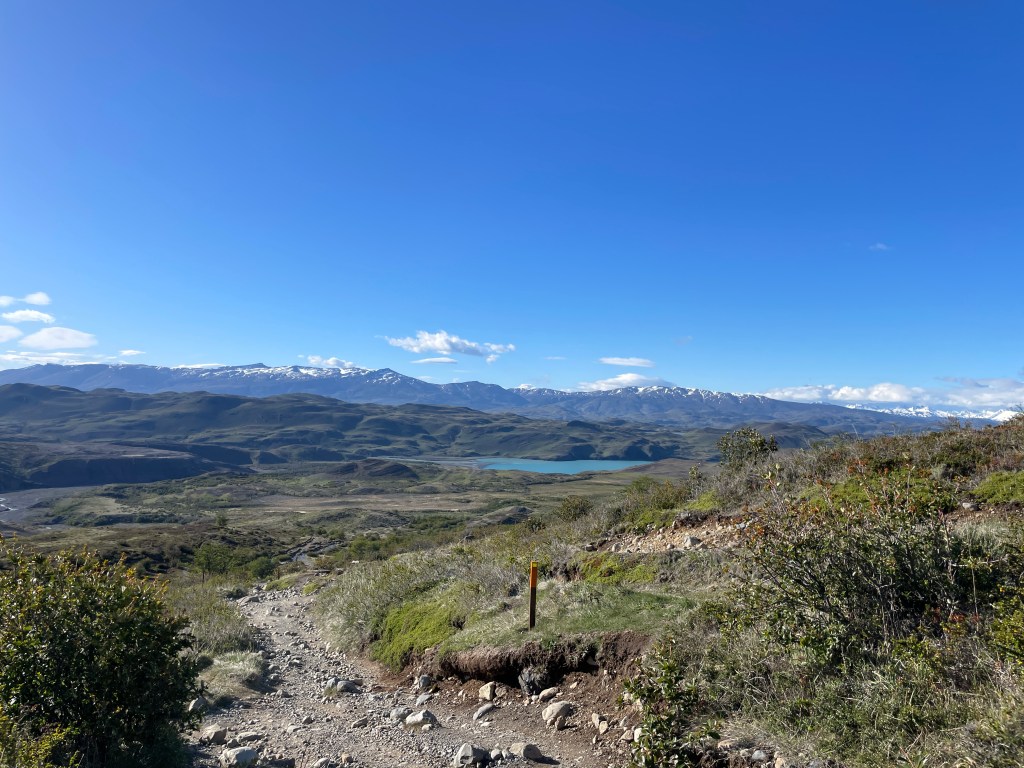
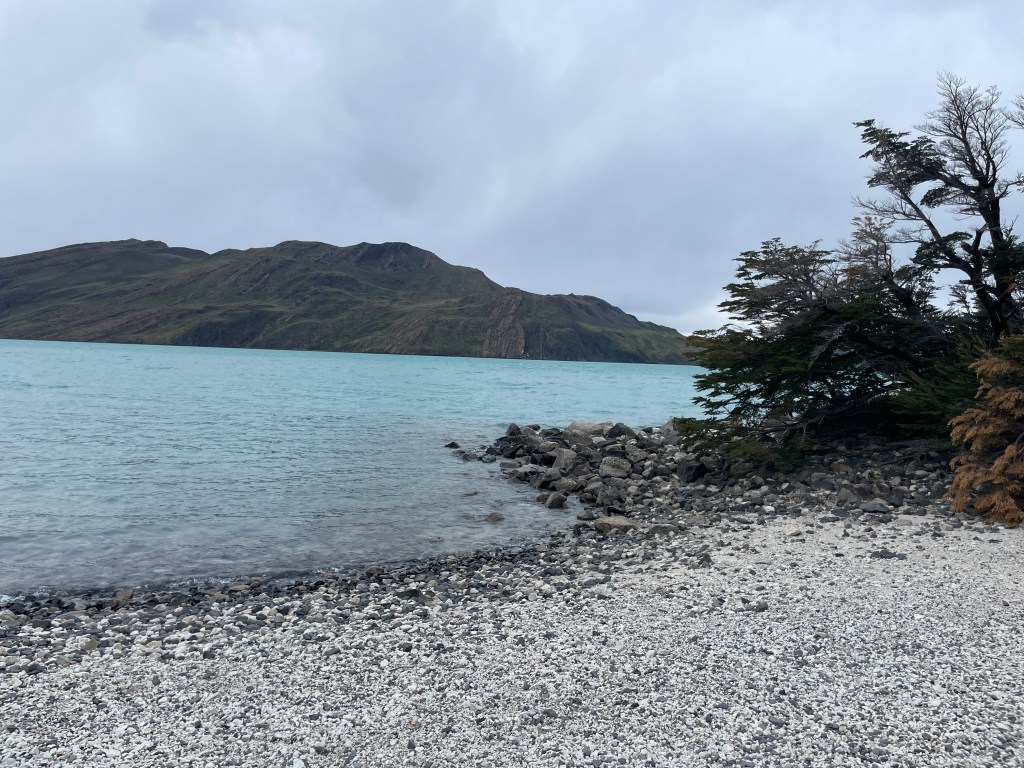
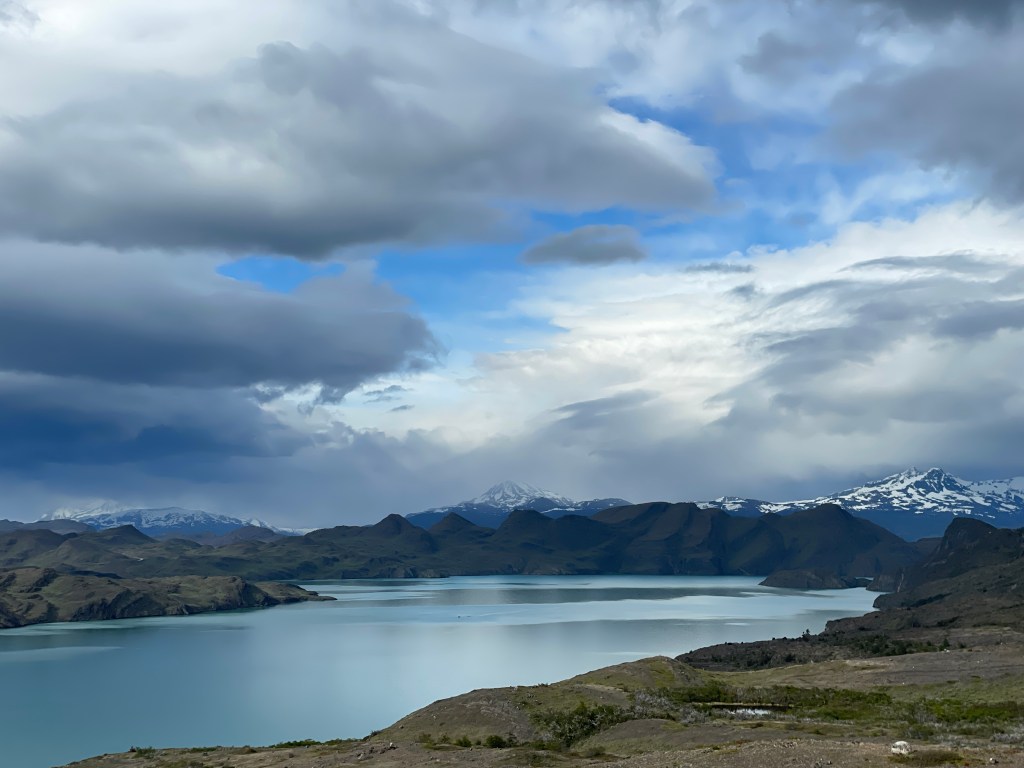
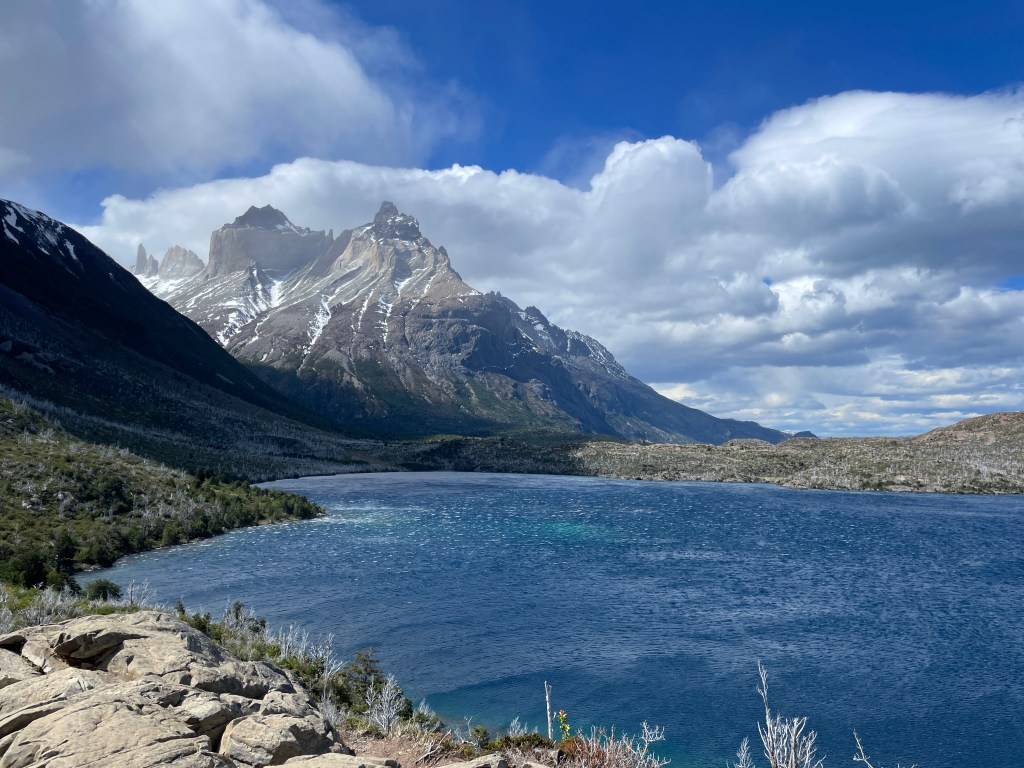
This is a beautiful day. While there are still some steep hills, there are also long flat stretches. You will follow lake Nordenskjold most the day and it is absolutely stunning. The lake changes color every 5 minutes. They say it takes about 4 hours and 15 minutes from Central to Cuernos but it took me 6 hours with two 15-minute breaks.

*If possible and you can get a spot, I recommend you continue the additional 1 ½ -2 hours to Frances. The location right on the lake is beautiful and this cuts the distance from the following day.
Day 4: Cuernos (or Fances) Britannia and Paine Grande.
The first hour from Frances to Italiano is flat, fast and easy. Italiano to the first lookout is a hard rocky uphill 1 hour and 30 minutes. I didn’t go on to Britannia. It is another 3 km uphill, but it was overcast, and I had a long day ahead of me.
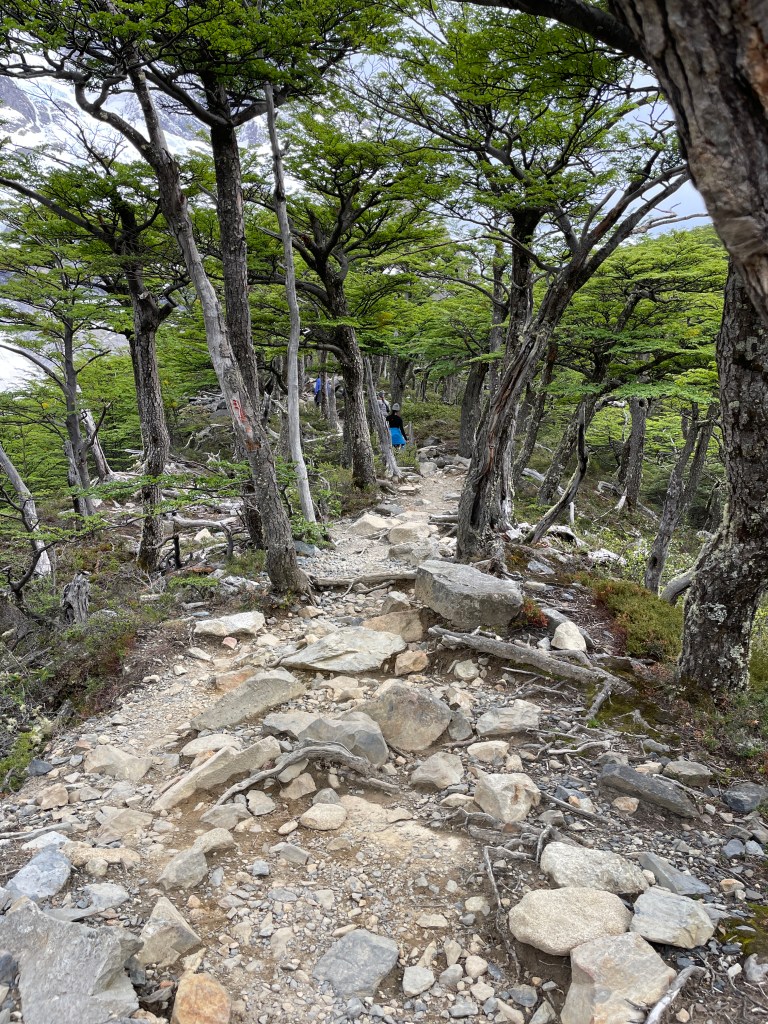


The rest of the day is realitively easy and flat but long. With stops, it took me around 5 hours to go from Italiano to Frances.
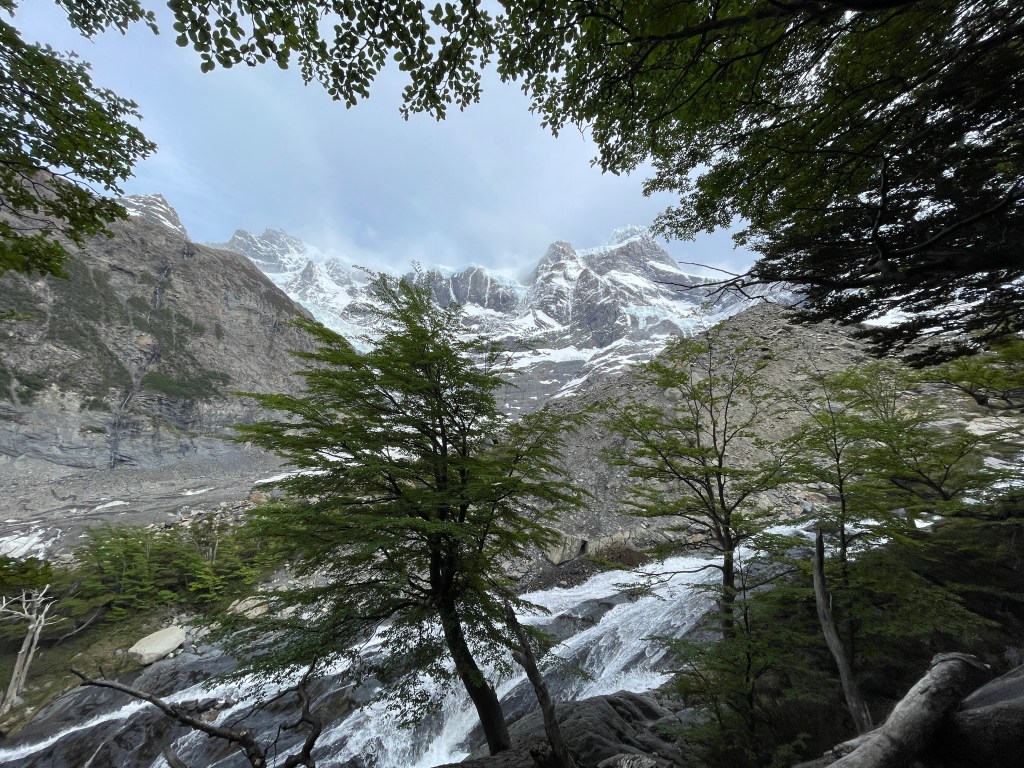
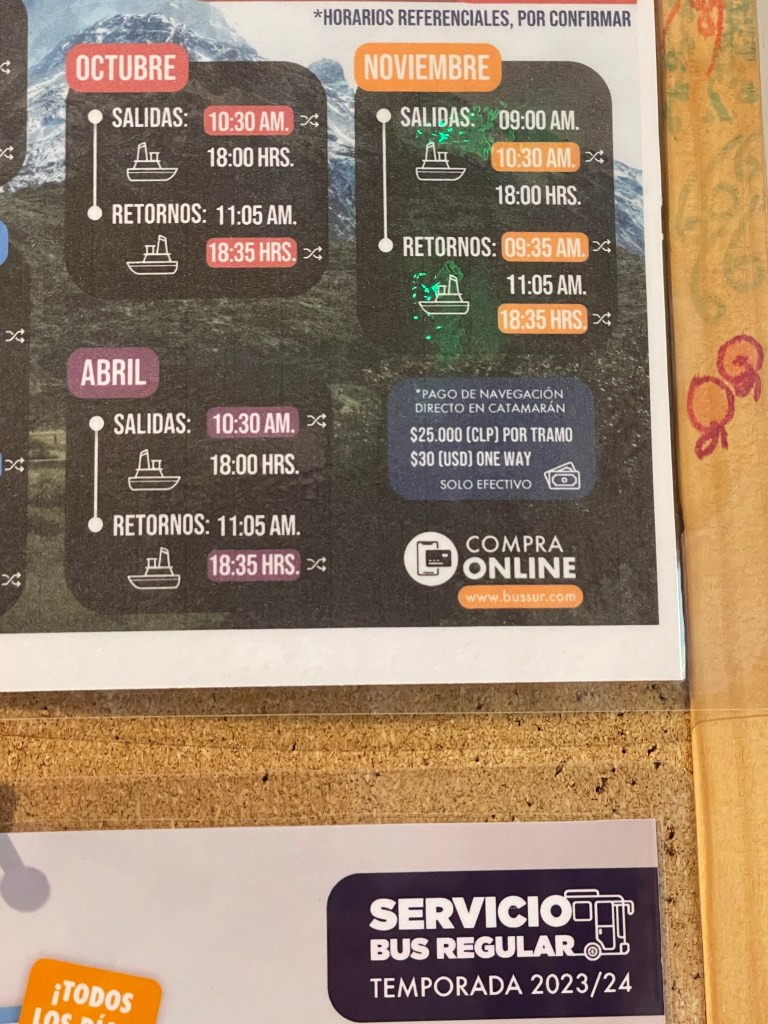
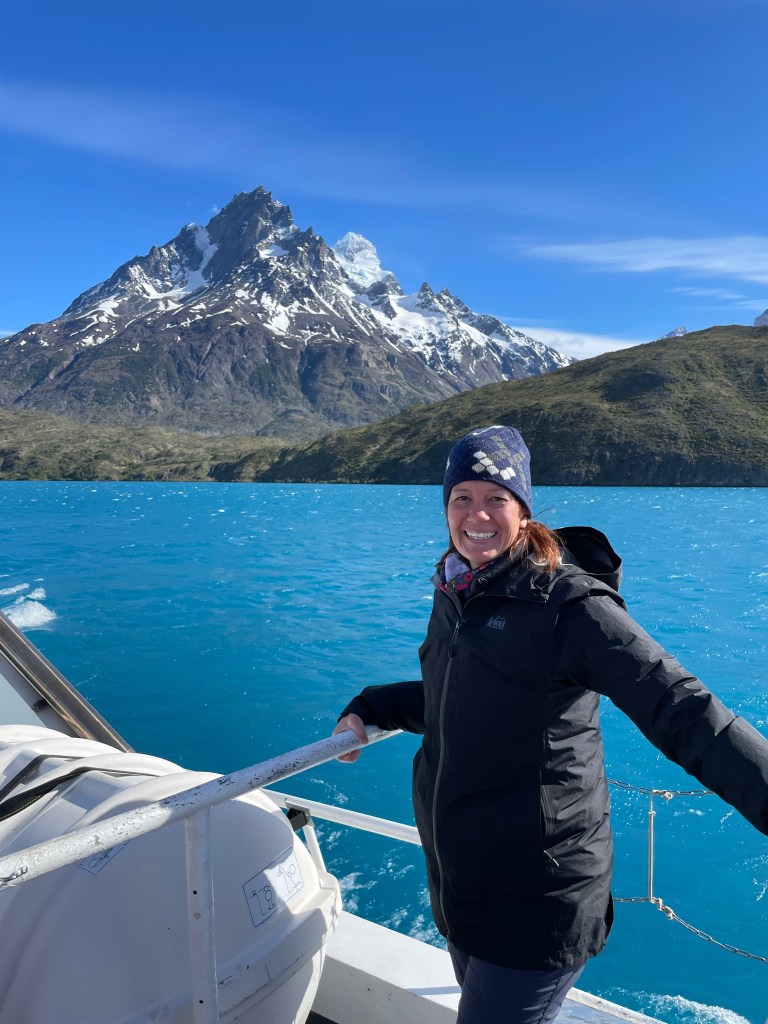
Day 5: Frances roundtrip to Grey Glacier and boat back to bus pick up.
It is 11 km to Grey Glacier. 7 hours is the average hiking time, but based on previous days, I assumed it would take me 9-10 hours. The ferry leaves twice a day at 0930(ish) and 1830(ish) – check times at Frances lodge. You can buy tickets to the ferry onboard or in advance but either way, the ferry is first come first serve.
I ended up taking a short hike from Grey but didn’t hike all the way to the end. I was just too worried about making the ferry and the bus back.
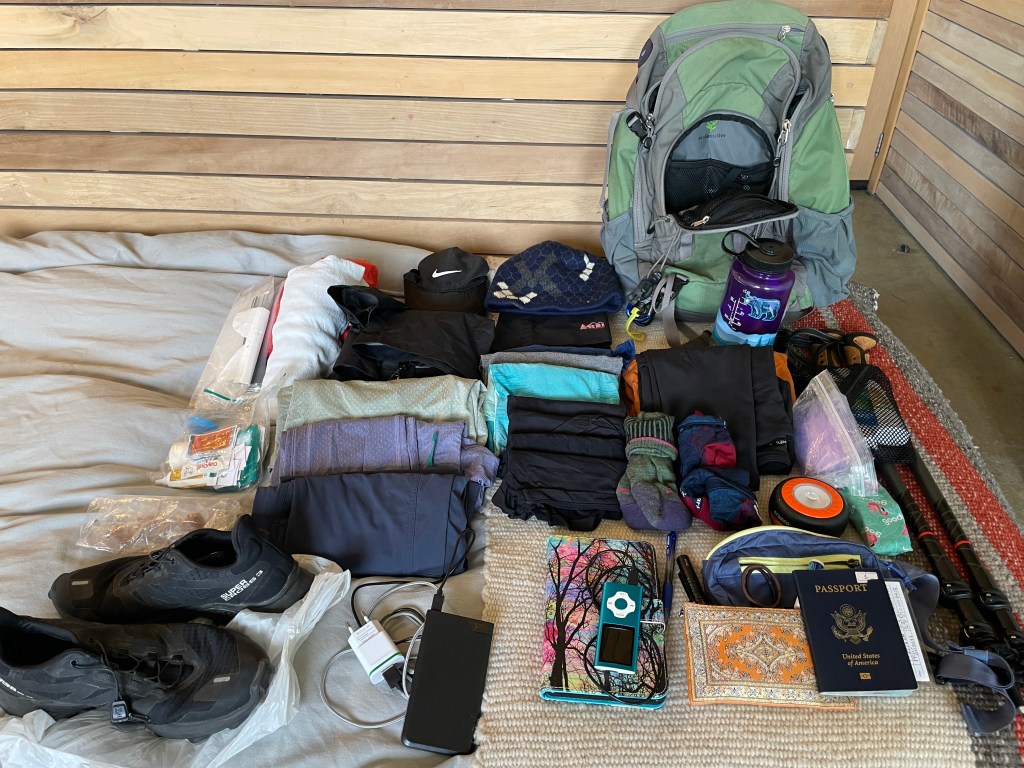
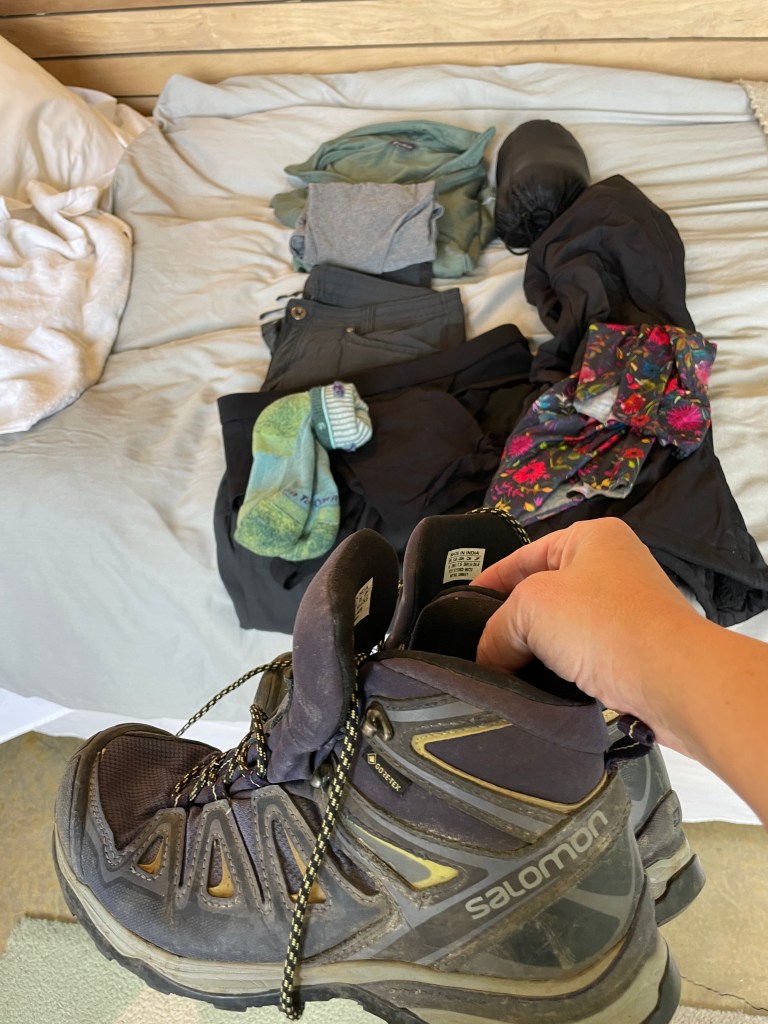
Packing: I used everything I brought except for my rain poncho, gaiters and lower body thermal underwear. I wore all my upper layers and while most people could probably cut one, I think I got very lucky with the weather. Pack in layers so you have options and are prepared.
40L pack (with rain cover) & a collapsible small day pack
Hiking poles
Fanny pack w/ wallet, passport, sunglasses, phone
Boots & Trail Shoes (most people probably don’t need both)
Shower Shoes
2 water bottles
Winter hat, buff and gloves
Puffy coat, inner coat (could replace with a heavier sweater/fleece), fleece top, base layer
5 tee-shirts / 5 pairs of underwear / 2 pairs of socks / 2 pairs of pants
Rain Coat, poncho, gaiters
Leggins and wool shirt to sleep (Refugios were warm but I was cold camping)
Small medical kit with nail clippers, nail file, Neosporin, Band-Aids, moleskin, duct tape, Tylenol/Advil
Small towel
Small toiletry bag with shampoo/conditioner, soap, comb, lotion, sunscreen
Plastic bags / waterproof bags in case of rain
Small Flashlight
2 carabiners
iPod and Kindle
Extra batter & cords for phone and kindle
Last Thoughts:
The W was a hard hike. I had not properly prepared. While I walk regularly and am not a couch potato, I’d not done any serious hiking or walking in a while. On most days I walk 4-5 miles as part of my daily routine getting to / from work. I started back to the gym about a month prior and also did two local hikes of moderate difficulty of 5 miles and 9.5 miles. At the gym, I would walk on a 6-7 incline at 3 mph for 45-60 minutes. Occasionally I would ramp it up to an incline of 9-10 for 5 minutes. The last mile of the hike to the towers was the most difficult (photos below).

I was fit enough to enjoy myself but I wish I’d done more. For every 2 hours the park said a section should take, it took me an extra 15 minutes. This meant an 8-9 hour day took me 9.5 hours plus breaks. I was slow. It also meant that on day three, I didn’t have enough time to do the entire hike.
Bring a day pack. For day 2 and day 5, I only brought the day pack hiking. And for day 4, I carried my pack to Italiano but then was able to quickly put just the essential items in my day pack.
Footwear. Due to the troubles I’d had on the Camino, I brought both boots and cross trainers. I am glad I did. I wore both and it was worth the extra weight. I needed the boots for the rocks and steepness of day 1. Also, there was still a little snow in early Nov, and the boots kept my feet drier than my cross trainers would have. But I appreciated the lighter trainers for the other days. You also need shower shoes and will want something for the evenings. A good sandal like Teva’s can do both.
All water in Chile is potable.
The Refugio’s have Wi-Fi for sale. It is expensive ($9 USD per hour) but you can keep in touch with home if needed.
Some other good blogs on the hike are:
How to Hike the Torres del Paine W Trek [2024 Guide] (worldlyadventurer.com)
Hiking The W Trek In Patagonia: A Self-Guided Itinerary – Two For The World
